Have you planted a tree in the Tucson area before?
Our climate, ground, and trees can vary wildly from other areas of the state, country, and world, so planting a tree in Tucson can be a unique experience.
In this article, I will walk you through the tree planting process as I plant a pomegranate tree in my Tucson-area yard. Here's what I'll cover:
Choosing the Tree
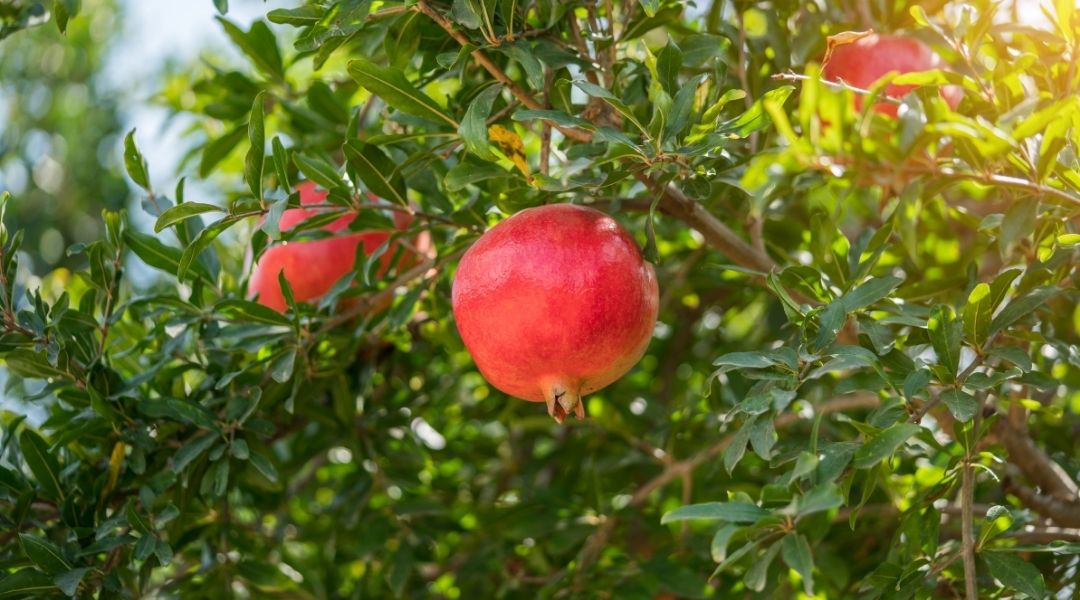
After trying pomegranate arils (seeds) for the first time a few years ago, it has become one of my traditions to purchase pomegranates when they are in season. I also love the look of the pomegranate tree - it's one of the few deciduous trees that grows well in the Tucson area, with colorful yellow foliage that drops every year.
I also have limited space and a variety of other trees on my property - large mesquite trees take over much of the front yard, and a palo brea and Mediterranean palm trees provide interest and shade to my back yard.
I considered purchasing a tree from TEP's Trees for You program but knew that I wouldn't be able to plant on the south, west, or east side of my property (one of the requirements for the shade tree program).
Finally, knowing the full size of a pomegranate tree, as well as its benefits and setbacks (like the thorns and "messy" nature of the leaves), I decided it would be best to plant it in my backyard.
Purchasing the Tree
Since I couldn't take advantage of TEP's shade tree program, I turned to Tucson Clean and Beautiful, which offers a variety of native and desert-adapted trees called "Trees for Tucson." As one of the organizations that plans several tree planting events throughout the Tucson area, I was familiar with them and their mission.
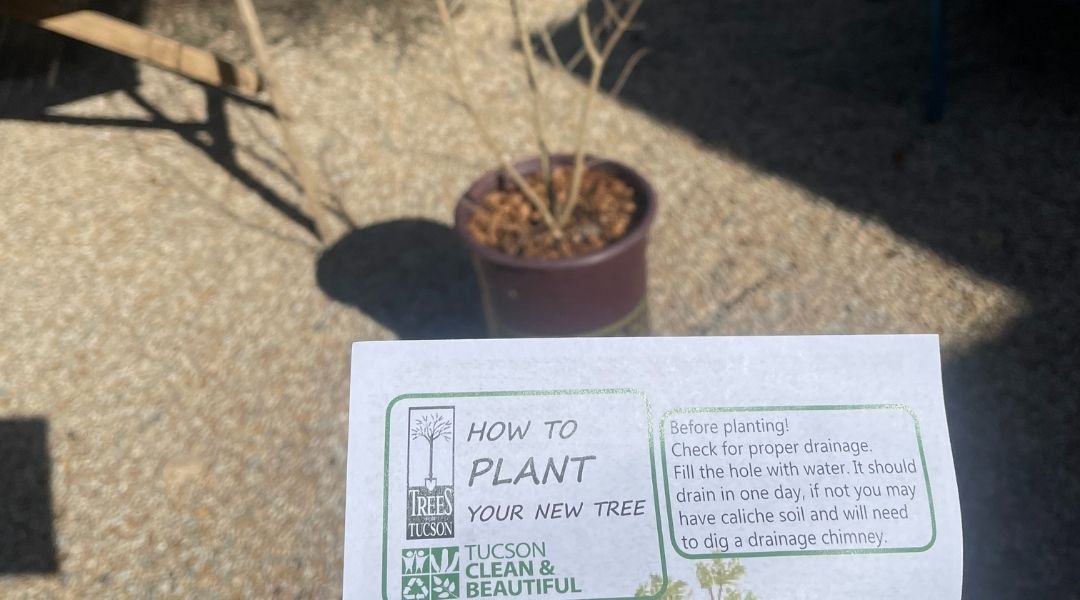
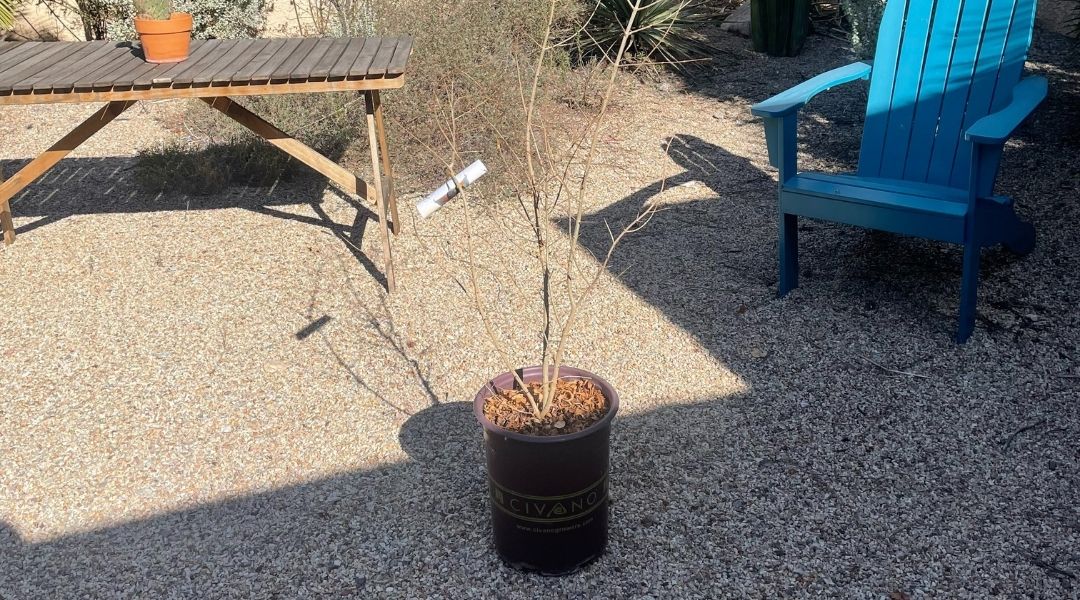
I ordered a pomegranate tree (which was locally grown by Civano Nursery) and some wood chips. Both were delivered to my front door the following week.
Picking the Best Spot for the Tree
Plant the Right Tree in the Right Place
We've already talked about the importance of planting the right tree in the right place, meaning that you should keep the following in mind when planting a tree:
- the mature size of the tree,
- its light, soil, and water needs, and
- any known issues, such as thorns, leaf drop, pest problems, toxicity, etc.
Some mature trees can grow to 30 or 40 feet tall and wide (or more!) and will need room not only for their branches but also room for the roots to spread out.
Even trees that are considered "smaller" grow much larger than what they look like when they are first planted. You always need to keep the mature size of a tree (or plant) in mind BEFORE you plant.
What to Consider
Some examples of things I looked out for when choosing a location were:
- What other trees or plants would be competing for light, water, or nutrients?
- How much sun do areas of my yard receive? How much shade?
- How close would a building, wall, sidewalk, driveway, or other structure be to where I would plant?
- Are there any slopes where water will run off or areas where water pools?
- What are the walking paths through the area and would a tree there disrupt this?
- Is there enough room for a tree (and its roots) to reach full size?
- Can I get to the tree to water and care for it?
- Will I mind if leaves fall in the area surrounding where the tree might go?
Preparing to Plant
I wasn't able to plant my tree immediately, so I made sure I moved it outdoors to an area close to where it would be planted. I also kept an eye on the weather. Although pomegranate trees are cold-hardy in Tucson, a young tree in a nursery pot can always benefit from a little "babying" - if it had gotten too close to freezing temperatures at night, I would have covered the tree or brought it indoors to prevent any chance of frost damage.
When I was ready to plant, I gathered the necessary tools:
- A sharp, sturdy shovel
- Gardening or work gloves
- Watering can and/or garden hose
- Box cutter (optional)
I also double-checked the area where I planned to plant the tree, adjusting the location slightly to make sure the tree was planted in the most ideal spot.
NOTE: It's a good idea to contact Arizona 811 several days before you start digging to check for any underground utilities.
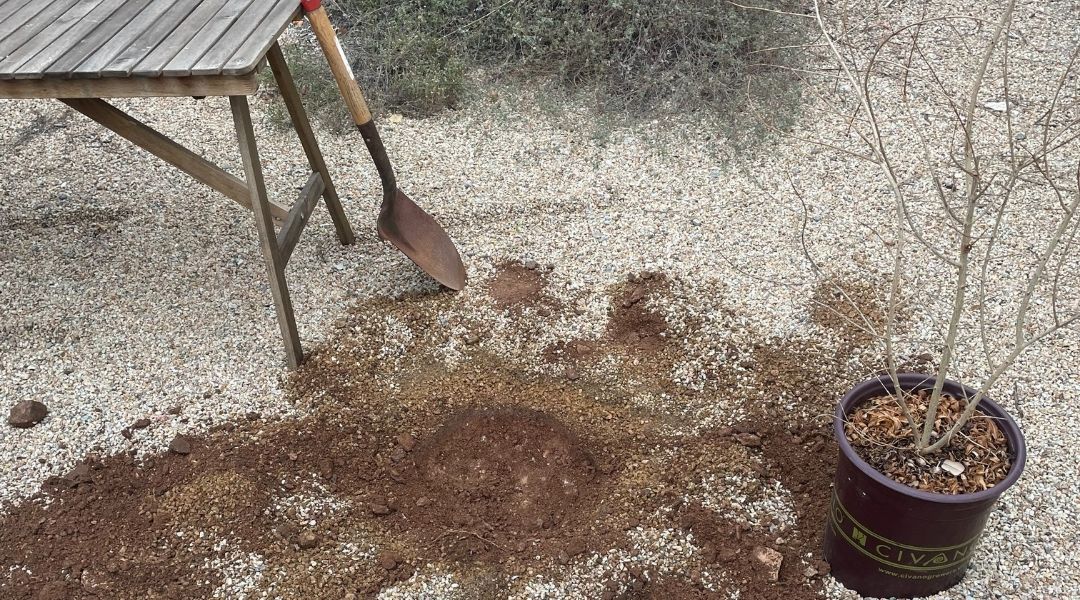
Digging the Hole
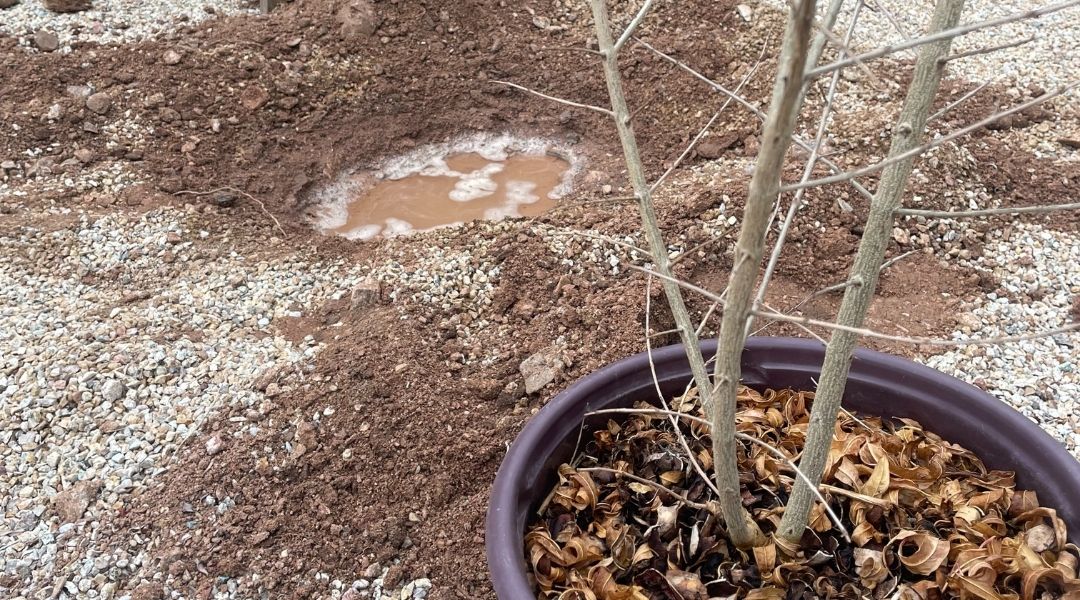
I knew that our soil was tough to dig in, but I wasn't prepared for how long it took me to do the simple task of digging the hole for the tree! I didn't run into any caliche or anything that I couldn't dig through, but there were a great deal of baseball-sized rocks that made the process more lengthy. I had to dig out these rocks with the shovel (or sometimes my gloved hands!)
Thankfully, the day I was digging it was also cool and a little rainy, which softened the ground a little bit.
If you have hard or compacted soil, try watering the area well a day or two before you plan to plant. It will make digging a planting hole much, much easier!
Also, make sure you have a shovel with a sharp, pointed end. Dull edges make digging much more difficult, as does trying to dig a hole in Tucson's rocky soil with a flat-edged spade.

Ensure the Planting Hole is the Correct Size
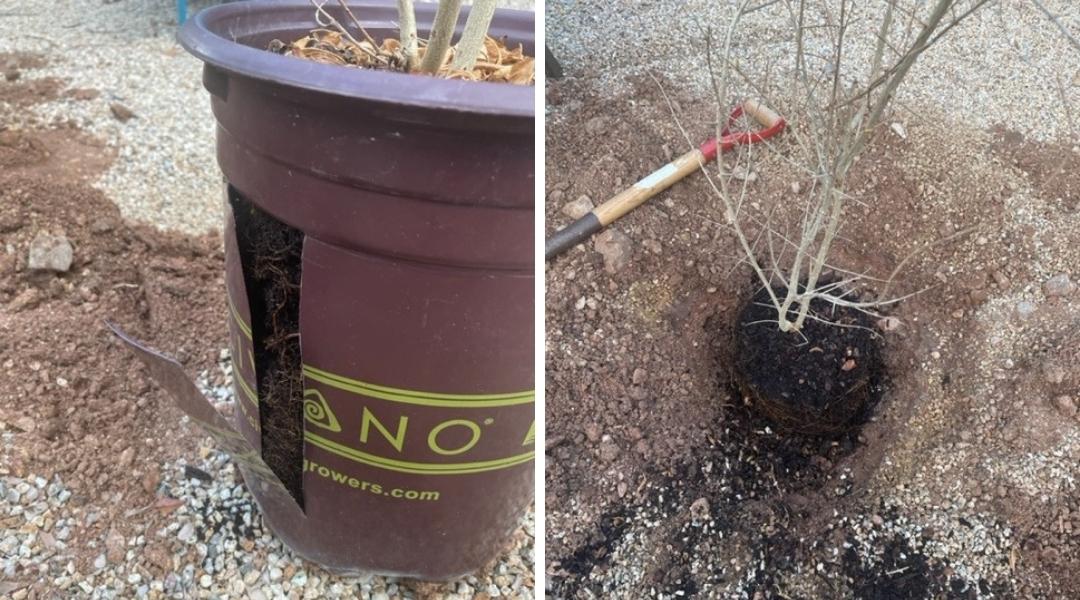
The planting hole should be just as deep as the rootball (NOT the nursery container) and two or three times wider. This ensures that the roots will be able to easily spread out.
Expose the Root Flare Before Digging!
Before digging the hole, I pulled the potting mix away from around the tree trunk. Many trees are planted too deep in their nursery pot, with the root flare (the point where the trunk widens and turns into roots) buried well beneath the soil level. Don't make the mistake of planting your tree at the same depth as it is in the container - always expose the root flare before determining how deep the planting hole should be!
To check if the hole is the right depth set the container (with the tree's root flare exposed) in the planting hole. The ground level should be just below the root flare.
Be careful not to dig the hole too deep; even if you fill it in, the tree will likely sink into the softer soil after planting (and planting too deep is one of the primary causes of premature death for new trees).
To see a demonstration of this, check out this "how to plant a tree" video from Tucson Electric Power and Civano Nursery.
Checking for Caliche
The soil in Tucson (and throughout the Southwest) can sometimes be filled with sections of caliche or a rock-hard layer of soil. If there is caliche in your soil, it will make digging very difficult. It will also make it hard for water to drain and difficult for roots to spread.
To check for caliche, fill the hole that you dug with water and let it drain. Then fill it again. If it takes longer than 24 hours for it to drain the second time, there is a good chance you have caliche in your soil and will need to create a chimney (a hole through the caliche layer to allow water to drain).
Thankfully, the water drained quickly in the hole I had dug so I was able to plant without any further work.
Removing the Tree and Filling in the Planting Hole
I used a box cutter to create a few vertical slits in the gardening container and one horizontal slit. This made it a little easier to get the tree out of the container and can help prevent transplant shock.
Once removed, I loosened the soil around the roots of the tree. If you see roots growing around in circles, this is a good time to gently pull them apart and straighten them out a bit. If you leave them, they'll keep growing in circles until they eventually "strangle" (girdle) the tree or it falls over.
I carefully placed the tree in the hole and backfilled the area around it with the soil that I had dug up. You don't want to pack the soil or you will deplete the oxygen (trees and plants need oxygen!) and make it harder for the roots to spread. Just gently tamp it down with your hands, making sure you don't leave any large air pockets.
You also don't need to add any potting soil, compost, or other soil. Native soil is best as that's what the tree will be growing in for the rest of its life.
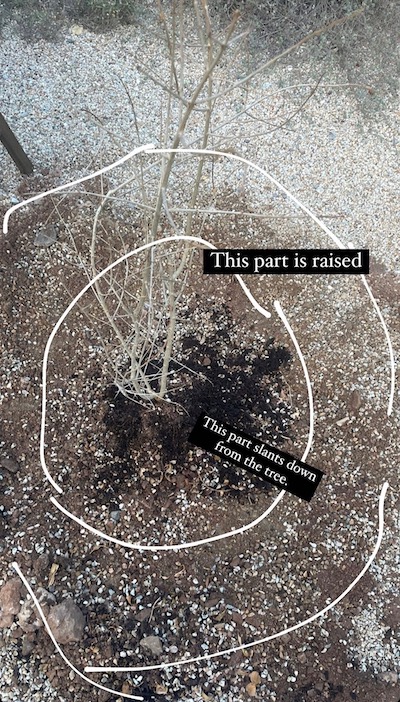
Creating a Berm or Well
As you fill in the hole, you can gradually start to create a berm (a raised "wall") around the tree. Don't cover the base of the tree! Leave as much of the root collar visible above the soil line as possible. Many people plant trees too deeply, causing issues for the tree.
The purpose of creating a berm is to keep water in a specific area (basically, you're creating a basin or tree well around the tree). Ideally, you want the berm to be at the drip line of the tree. The drip line is an imaginary line from the outermost part of where a tree's foliage would be to the ground beneath it. Water would naturally drip from the leaves at this point when it rains, and that's where you want to encourage the roots to grow. As a tree grows, the berm becomes larger to move with the drip line.
As I was creating the berm, I pictured it sort of like a donut around the tree. It keeps the water close to the tree's roots and prevents it from flowing to other parts of the yard. You want the tree to be a little higher than the soil inside the berm, so the water will move down to the roots (watering the tree trunk does no good).
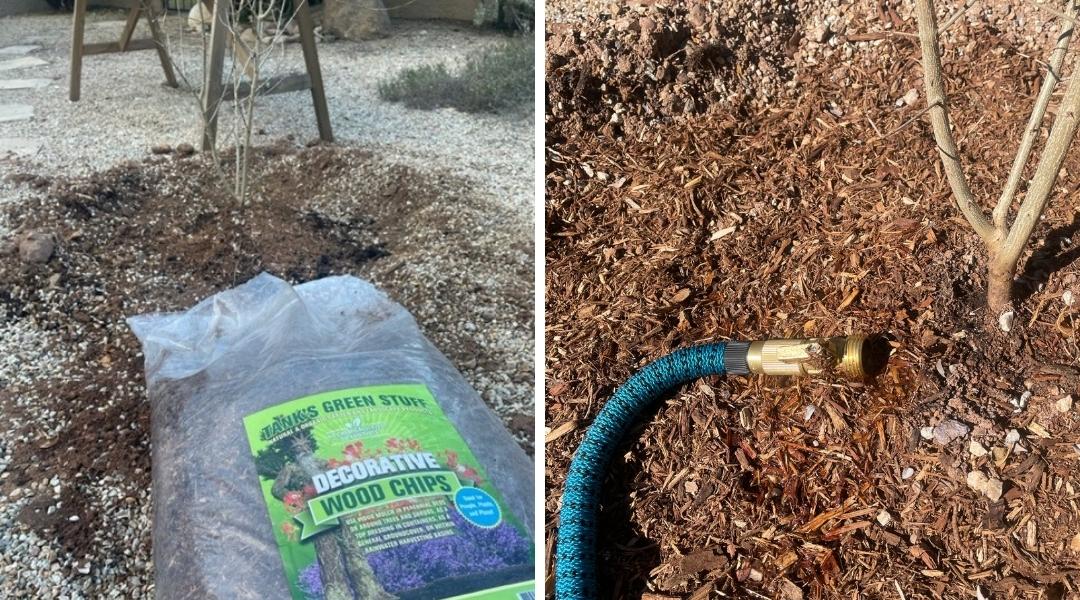
Adding Mulch
When I ordered my tree from Tucson Clean & Beautiful, I also ordered a bag of mulch. Mulch is great for so many reasons, including:
- It keeps tree roots warm in winter and cool in summer, regulating soil temperature so the roots and tree are not stressed.
- Mulch (from wood chips) adds nutrients and organic matter to the soil in a natural way.
- Mulch is great at keeping moisture close to the tree and preventing water from evaporating, ensuring that no water is wasted.
There are other benefits of mulch but suffice to say that I knew I wanted to add some around my new tree, especially since several cold days and nights were still to come.
You can add 1-3 inches of mulch inside the basin, but make sure that the mulch does not touch the tree itself, or it can lead to tree injury and decay.
Taking Care of a New Tree
Watering and protecting a newly-planted tree for the first two years after it is planted are vitally important. Most trees that die early will die in those two years.
Watering
There are several ways to water a tree.
Some resources suggest filling a 5-gallon bucket and pouring it into the basin around the tree about 3 times to give your tree a quick 15-gallon drink. If you do that, do it before you add the mulch.
Soaker hoses are a wonderful way to make sure that water reaches all sides of a tree to water it slowly and thoroughly.
Using what I already had, my method has been to attach a garden hose to an outdoor faucet, turn it on so that the water is just slightly flowing, set a timer for about an hour, and move the hose several times around the tree basin within that hour.
No matter which method you choose, slow and deep watering is preferable to frequent, shallow waterings. Again, you want to encourage the roots to grow.
Protecting Your New Tree
If your tree is frost-sensitive, you may need to cover or wrap it to protect it from cold nights. Make sure you know what temperature your tree can tolerate before it suffers from frost damage.
Some tree trunks can suffer from sunburn or sunscald and will need to be wrapped or otherwise protected.
We have had a few cold nights since planting my pomegranate tree, but this type of tree is cold tolerant down to 10 degrees Fahrenheit, so I haven't had to add any additional protection. I make sure it has plenty of water before cold weather and am grateful for the organic wood mulch that keeps the roots warm.
Pruning or Fertilizing
There's no need to prune or fertilize a tree for the first year or two after it is planted. The focus should instead be on helping the tree adjust to its new environment so it can begin to grow and send out roots.
Staking a Newly-Planted Tree
Some trees come with a stake to help the tree grow straight, and some people choose to add stakes to help steady the tree after planting. However, in most cases, staking is not necessary; in fact, it can often do more harm than good. For example, stakes and the ties that are used to attach them to a tree, can dig into a tree and restrict its growth if they're left in place too long.
I chose not to use stakes. About a week after I planted the tree, we had wind gusts of up to 45 miles per hour, and I watched the little pomegranate tree move with the wind. I was grateful for this windy day, as it can help a young tree grow strong. When attached to a stake, the tree doesn't have that same opportunity.
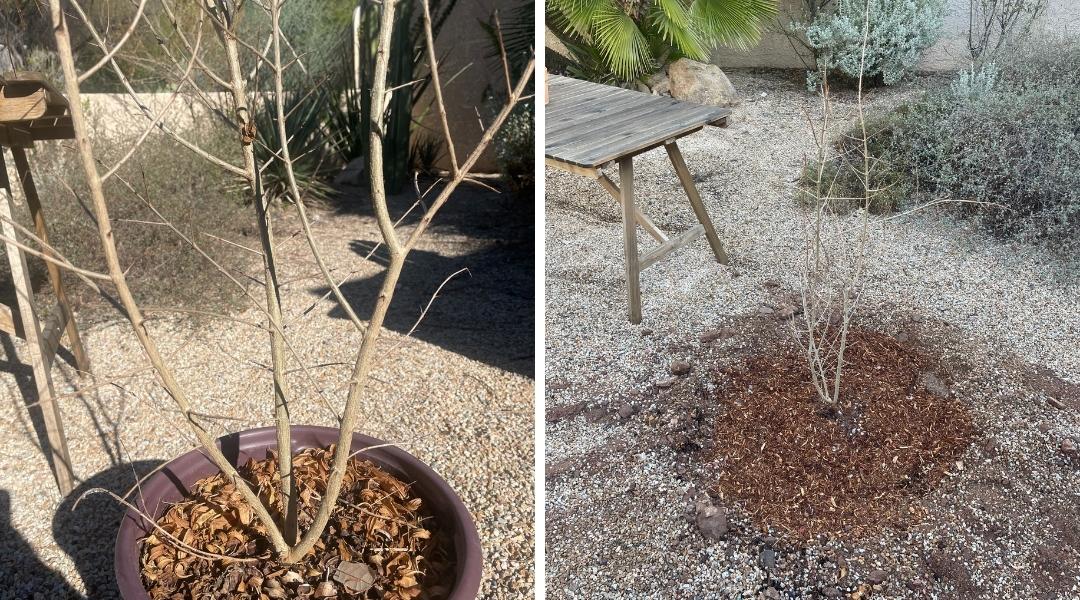
A pomegranate tree before and after being planted in a Tucson-area yard
I'm definitely keeping my eye on the newly-planted tree and will be excited when the foliage appears. After a few years, I could be enjoying pomegranate fruit from my own yard!
Tell us about your Tucson tree planting adventures in our Tucson Yard and Garden Facebook Group!
Other Resources
Tree Planting with Tucson Clean and Beautiful (video)
How to Plant a Tree from Tucson Electric Power (video)
Managing Caliche in the Home Yard from the University of Arizona (PDF)
Tree Planting and Maintenance from Tucson Clean & Beautiful, Inc.
Benefits of Trees in Tucson's Desert Landscapes & Yards